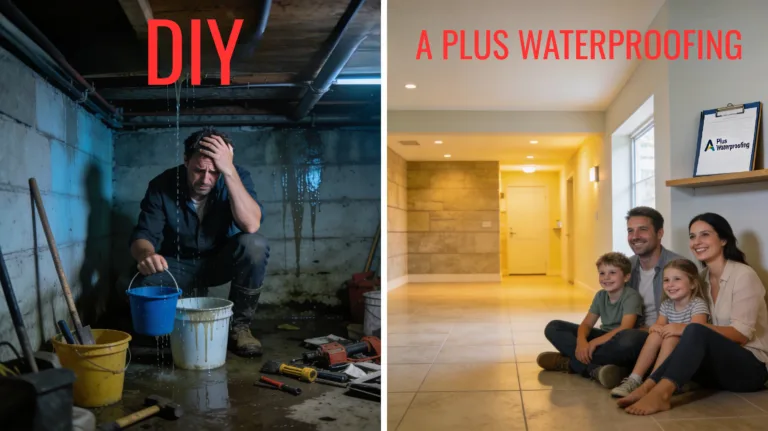
DIY Basement Waterproofing vs Hiring A Plus Waterproofing: Pros, Cons and Risks
DIY basement waterproofing can look like a money-saver, but the risks of leaks, hidden damage, and non-compliance often outweigh the short-term savings when compared with bringing in a specialist team like A Plus Waterproofing. This article walks Kiwi homeowners through the pros, cons, and risks of doing it yourself vs hiring A Plus, so you can make a confident, informed call for your Auckland property.
Why Basement Waterproofing Matters So Much in Auckland
Auckland’s climate and geology don’t make life easy for basements. We get significant annual rainfall, frequent heavy downpours, and a lot of properties built into sloping sites with clay soils. That combination means water tends to collect around foundations and below‑ground walls, increasing hydrostatic pressure – the force of water pushing against your basement walls and floor.
If the waterproofing system is missing, damaged, or simply never designed for these conditions, water will exploit any weakness it can find. Common symptoms of basement moisture problems in Auckland include:
-
Damp or cold walls and floors
-
Efflorescence (white, powdery deposits on concrete or block)
-
Musty smells that don’t go away, even after cleaning
-
Visible mould on walls, skirting, or stored items
-
Pooled water after heavy rain or prolonged wet weather
Left alone, these issues can affect structural elements, encourage mould growth, and make the space unusable as a bedroom, office, or rumpus room. They can also put buyers off when it’s time to sell, particularly in a market where people are more aware of moisture and healthy home requirements.
DIY Basement Waterproofing: The Upside
There’s a reason so many homeowners search for DIY basement waterproofing tips: at first glance, it looks straightforward and budget‑friendly.
Cost control and flexibility
One of the biggest attractions of DIY is the lower upfront cost. You can buy patching compounds, crack fillers, and “waterproof paints” from the hardware store and keep cash outlay relatively modest. For very minor dampness, that might seem like a good trade‑off.
You can also spread the work over a few weekends, focus on the worst‑looking areas first, and stop and start as time allows. For a practical, hands‑on homeowner, that sense of control is appealing.
Learning about your home
Tackling small waterproofing jobs yourself forces you to look more closely at your basement and understand how water is behaving around your property. You might discover blocked gutters, downpipes discharging too close to the foundation, or surface water pooling against the house – all issues you can address without major building work.
This learning is valuable later on, even if you end up bringing in A Plus for a proper system, because you can describe the history and behaviour of the leaks more clearly.
Short‑term or low‑stakes situations
DIY can make sense in low‑risk scenarios where:
-
Dampness is very minor and there’s no sign of active leaks, mould, or structural cracking
-
The basement is only used for non‑sensitive storage
-
You already plan a bigger renovation, extension, or excavation in the near future
In these cases, applying a breathable masonry sealer, improving ventilation, and using a dehumidifier can reduce surface dampness while you plan larger works. Just be clear that this isn’t full basement waterproofing – it’s a temporary comfort measure.
DIY Basement Waterproofing: The Downside and Real Risks
Where DIY often falls apart is that most products on the shelf are sold as quick fixes, not as parts of a cohesive, engineered waterproofing system. Basements, especially in wet climates like Auckland, usually need systems, not spot treatments.
Misdiagnosing the cause
The most common DIY mistake is treating what you can see, not what’s causing it. For example:
-
Painting over a damp patch without addressing external drainage or failed exterior membranes
-
Filling a crack but ignoring hydrostatic pressure that’s building behind the wall
-
Sealing the inside only, while water continues to saturate the wall from the outside
This might look “fixed” for a few months, especially in dry weather, but once soil moisture and groundwater levels rise in winter, the problem returns – often worse than before.
Trapping moisture and creating new issues
Many DIY waterproof paints and sealers form a non‑breathable film on the inside face of a wall. If moisture is still entering the wall from outside, that trapped water can:
-
Build up pressure behind the coating, leading to blistering and peeling
-
Encourage hidden mould growth inside walls and behind linings
-
Accelerate damage to plasterboard, timber framing, and floor coverings
On paper, the wall looks “sealed”. In reality, you’ve just hidden the problem instead of relieving the pressure and controlling the moisture.
Structural and safety concerns
DIY work that involves drilling, chipping, or chasing into concrete and block walls can be risky if you don’t understand the structure. You might:
-
Cut into reinforcing steel or compromise a load‑bearing element
-
Create new pathways for water to track into the basement
-
Damage an existing membrane that was still doing part of the job
There are also safety risks when handling certain waterproofing products, which can contain strong solvents, isocyanates, and other chemicals that require correct PPE and ventilation. Without it, you’re exposing yourself and your family to unnecessary health hazards.
False economy and double costs
One of the biggest hidden costs of DIY basement waterproofing is that failed attempts often need to be reversed before a professional can install a proper system. That can mean:
-
Grinding off DIY coatings so professional membranes can bond
-
Removing damaged linings and floor finishes that were installed over damp substrates
-
Addressing extra cracking or damage caused by previous repairs
By the time you add up DIY materials, your time, and the cost of undoing work, you can easily spend more than if you had gone straight to a professional in the first place.
When DIY Might Still Be Reasonable
Despite the risks, there are specific situations where DIY can be a reasonable part of your strategy – as long as you stay honest about its limits.
-
Cosmetic damp only – Mild efflorescence or a slightly “sweaty” wall, with no musty smell, mould, or obvious leaks, might respond to improved drainage, better ventilation, and careful surface treatment.
-
Non‑habitable spaces – If a basement is genuinely non‑habitable storage and you’re not storing valuable items, basic damp reduction measures can be acceptable.
-
Short‑term bridging – If you already know you’ll be renovating, re‑tanking, or selling within a defined timeframe, light DIY can buy time while you line up professional work.
Even in these cases, you should keep an eye on the space for evolving signs of damage or mould, and be prepared to involve an expert if things worsen.
Why Hiring A Plus Waterproofing Changes the Game
A Plus Waterproofing specialises in solving leaky basements, garages, and retaining walls across Auckland, with systems tailored to local conditions rather than generic “one size fits all” products. There are several key advantages to bringing in a dedicated basement waterproofing team instead of relying on DIY.
Proper diagnosis and clear plan
Instead of guessing at the cause, A Plus starts with a thorough inspection of your basement and surrounding site. That typically includes:
-
Checking for signs of hydrostatic pressure, movement, and previous repairs
-
Looking at external drainage, downpipes, and ground levels around the house
-
Identifying active leak points, cracks, joints, and vulnerable connections
From there, they can design a system that addresses both symptoms and root causes, whether that means internal membranes, external tanking, upgraded drainage, or a combination.
System‑based solutions, not patchwork
Professional waterproofing isn’t about a single product – it’s about how components work together. A Plus uses trade‑grade membranes, drainage components, and detailing accessories that are designed as complete systems and selected for performance in Auckland’s climate.
That might include:
-
High‑build liquid or sheet membranes tied into floor and wall junctions
-
Internal or external drainage channels and sumps where needed
-
Proper crack treatment and movement joint detailing
-
Protection layers to shield the waterproofing from damage
Each element is chosen and installed so the whole system works as a continuous, reliable barrier and water management solution, not a series of isolated patches.
Professional installation and safety
A Plus’ installers work with these systems every day, so they understand:
-
Correct surface preparation for adhesion and durability
-
How to handle tricky details like corners, penetrations, and joints
-
Safe use of primers, adhesives, and membranes in confined spaces
That experience significantly reduces the risk of voids, weak spots, or missed areas that can compromise performance. It also means health and safety standards are taken seriously, protecting everyone who lives in the home.
Long‑term performance and property value
A professionally waterproofed basement is designed to stay dry through multiple Auckland winters, not just the next storm. When the work is documented and traceable, it can also:
-
Increase buyer confidence when you sell, particularly if the basement is used as living space or a bedroom
-
Support valuations and lending where moisture issues might otherwise raise red flags
-
Make future renovations more predictable because there’s a known, reliable waterproofing layer in place
Compared with DIY, the long‑term cost per year of a robust professional system is often far lower, especially when you factor in avoided damage and hassle.
DIY vs A Plus Waterproofing: Side‑by‑Side
| Aspect | DIY Basement Waterproofing | Hiring A Plus Waterproofing |
|---|---|---|
| Upfront cost | Lower product spend, high time investment. | Higher initial cost, includes labour, design, and system installation. |
| Diagnosis | Based on what you can see; easy to misread causes. | Structured inspection, identifies sources and risk factors. |
| Solution type | Patch‑based, usually single products. | Integrated membrane and drainage system matched to the property. |
| Product quality | Consumer‑grade paints and sealers. | Trade‑grade, system‑tested materials suited to Auckland conditions. |
| Installation quality | Depends entirely on your skills, time, and patience. | Delivered by experienced waterproofers following best practice. |
| Longevity | Often short‑term, prone to peeling and recurrence. | Designed for long‑term performance through multiple wet seasons. |
| Structural/health risk | Risk of hidden damp, mould, and accidental damage. | Risks actively managed with proper detailing and safe methods. |
| Impact on resale | DIY raises questions for buyers and inspectors. | Documented professional work can be a strong selling point. |
| Peace of mind | Ongoing monitoring, repeat fixes, uncertainty. | Clear plan, documented system, and confidence in long‑term performance. |
The Real Risk of “Getting It Wrong”
Whether it’s DIY or a poorly designed professional job, substandard basement waterproofing carries serious consequences.
-
Structural risk – Persistent water ingress can corrode reinforcing steel, weaken concrete, and contribute to cracking and movement in walls and foundations.
-
Health impacts – Damp, mould, and musty air can affect the whole home, aggravating asthma and respiratory issues.
-
Financial pain – Replacing damaged linings, flooring, and contents is expensive; repeat failures increase stress and cost.
-
Resale and insurance – Moisture problems can scare buyers, complicate insurance claims, and slow down sales.
For most Auckland homeowners, the basement isn’t just another storage area – it’s a critical part of the structure and a key influence on the home’s overall health and value.
Choosing What’s Right for Your Basement
DIY basement waterproofing has its place for very minor issues and short‑term comfort, but it isn’t a substitute for a properly designed system when leaks and dampness are significant.
If you’re seeing active leaks, repeated damp patches, visible mould, or if you want to make your basement a genuine living space, the safer, more cost‑effective route is to engage a specialist like A Plus Waterproofing. Their Auckland‑specific experience, system‑based solutions, and professional installation give you a dry, usable basement and protect the long‑term value of your property.
Use DIY for minor, low‑risk situations and as a learning tool – not as the main solution for a leaky basement in a city where water is always looking for a way in. When it really matters, getting A Plus Waterproofing on your side helps ensure the job is done once, done right, and built to last.